Back to DIY submenu
ADVENT CALENDAR:
I grew up always having an advent calendar before Christmas, and I wanted
one for my dollhouse as well. I will start this page with two different versions of the
advent calendar I made - feel free to save either of them and use it in your own dollhouse
(please contact
me first if you want to put it on your own site, or sell any scenes where
you have used it).
To save a picture, hold your mouse cursor over it, right-click, select "Save Picture As..."
from the menu, and remember which folder you save it in so you'll find it later for
printing! (If you want to print it right away, select "Print Picture...")

This version has the dates 1 - 24 marked on it.
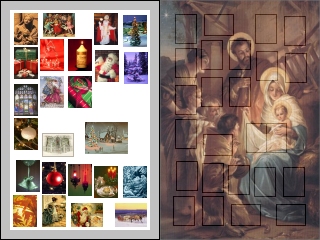
This version is without the dates.
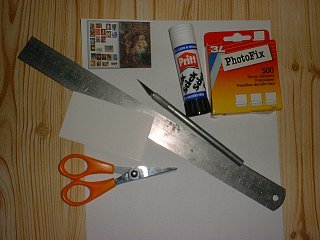
Here's what I used putting the calendar together (well, actually I didn't need that
metal ruler after all..) LIST: Print-out of the calendar, paper glue stick, double-sided
photo stickers (double-sided sticky tape will do as well), piece of card, metal ruler
(optional), scalpel, scissors.
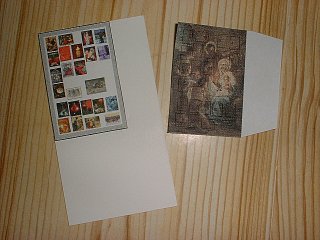
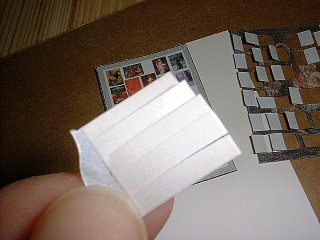
Cut out the calendar background (the part with small pictures), and glue it on thin
card using paper glue stick. As you can see in the picture, I left a slip of paper
on the front picture, to have something to better hold it in place while cutting the
little windows.. You don't necessarily need to do this, but I found it makes it
a bit easier.

Cutting the windows.. You can use a metal ruler if you like, but I found it easier to
just follow the marked lines with the scalpel. Remember not to cut all four sides!! Cut
only three sides, so that you can open them like doors.. Also, use some cardboard
between your calendar and the surface you're working on, or you'll end up ruining your
desk/table..
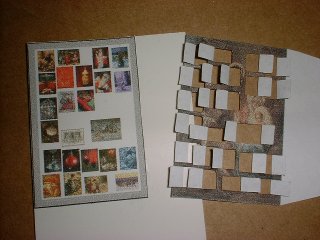
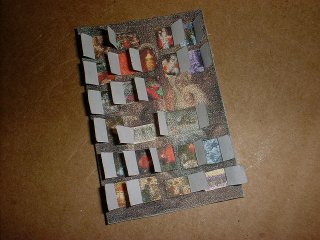
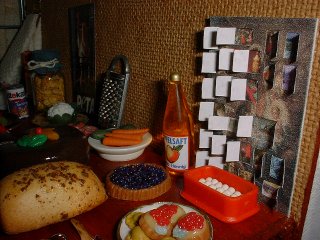
All windows cut. I've used the numbered version of the calendar, and made the windows
open on the number sides.
You CAN use paper glue stick in this last phase as well, but there's only the pale grey
area to glue the edges, and some white gaps between the small pictures where it's good
to put glue or sticky tape as well, so it might be easier to cut thin strips of tape or
sticker than apply glue on such tiny areas. Whatever best works for you..
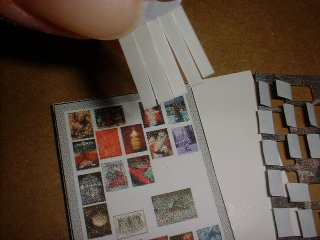
I'm about to put photo sticker strips in place..
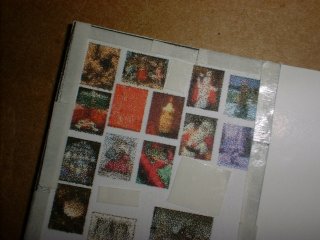
Ready to add the front picture.
Carefully put the front picture in place, starting from a corner to make sure that you'll
get it straight. I cut out the excess card and paper as well, before taking this picture.
My French chef is happily living on December 24th already - in early October as it is when
I'm making this page! You *could* close the windows again after putting the calendar together
(trust me, you DO want to properly open them before gluing as otherwise you'd end up ripping
parts when trying to open them for the first time afterwards..), and start opening them from
December 1st, one window per day (following the numbers), but personally I'm happier with just
the look of having the calendar in my dollhouse.
Back to DIY submenu