Back to DIY submenu
EASY PLANTS FOR DOLLHOUSE:
There are lots of great websites that show you how to make houseplants for your dollhouse, but here's something very easy and quick that doesn't take lots of money or skill, but will still look very nice..
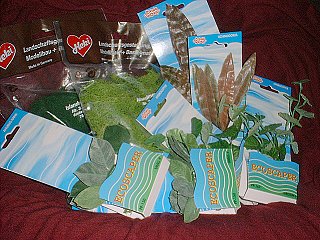
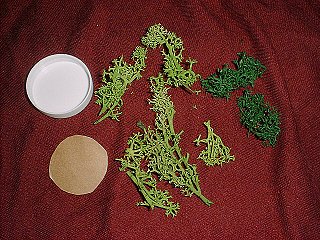
The green materials in these plastic bags were originally meant for model railway
landscaping, but nothing's stopping you from using them for other stuff as well.
The bags are quite big, and I paid over €6 for each, but if you know other dollhouse
enthusiasts (or someone who's into model landscaping), you can always shop together
and swap materials, so everyone gets a little bit of everything without having to
buy a whole bag of it.
The open packages are plastic plants that were originally fishtank accessories!
Their prices were between €2-€5 per package (depending on plant size), and one
package generally makes one really goodlooking houseplant for your dollhouse.
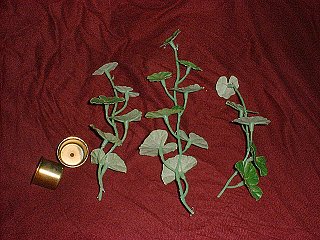
Here I have pulled the usable plant bits out of their heavy bottom part, and
I am planning to make a houseplant, using one of these metal parts as a pot.
Read on, and you'll find more instructions..
The white part is a plastic lid from a Hermesetas (sweetener) dispenser. I'm
planning to make a little kitchen garden for my French chef, using this lid as
a tray, and planting some of this landscaping stuff for "herbs".. You can use
a little sheet of paper and shove little bits of green stuff through it to make
them look more organised, or you can just apply glue straight to your little
tray, sprinkle on some ground coffee (for soil), and "plant" your little herbs
before the glue dries!
If you use that little sheet of paper, remember to finish by applying glue on
top of it and sprinkle ground coffee for soil (or whatever you might be using
for soil..).
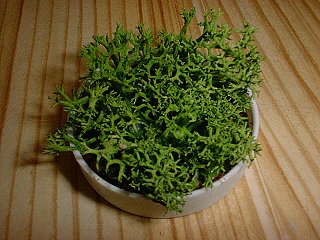
My kitchen garden..
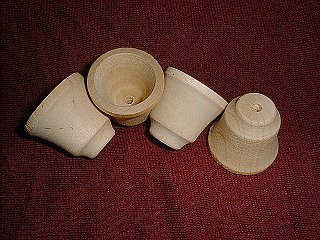
I bought these wooden parts from a Finnish crafts shop (Hobby Point, Helsinki).
They are really good for little flowerpots. I painted some with acrylic paint,
and some with nail polish! I had some golden shine nail polish, which gave
a Christmassy look for the pot I used it on.
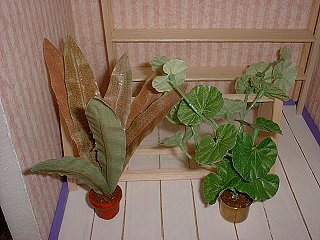
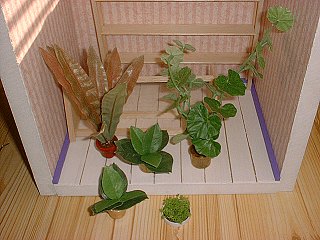
The first two "aquarium plants" (pictured in an unfinished roombox). The left flowerpot
is wooden, and I've painted it with transparent brown acrylic paint. The same colour
I used on my balsa wood wardrobe (see my Mini Diary for pictures of that one). The
right flowerpot is a metal one.
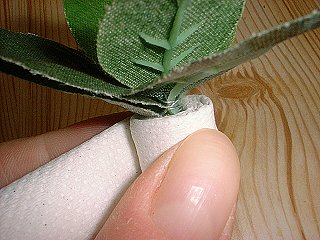
And here's how you make them: Start by pulling the plant parts out of their heavy
bottom (meant to be buried under pebbles in a fishtank). Try them in the pot you're
going to use (anything goes if you think it looks nice.. little jars, lids, whatever..),
and trim if necessary.
Organise the parts in a way you want them - if there are different sizes of leaves,
it might look more natural to put smaller leaves in the middle (new growth) and
large (older) leaves around them.. but it really depends on the plant, and I don't
think your dolls will complain if you use some artistic freedom!
Use metal string to wrap the plant parts tightly together at the part that will be
in the pot. Then wrap some tissue (or fabric / ribbon / wool...) around them until
they fit the flowerpot firmly. Do test before gluing, just to be sure you don't have
them falling over or not fitting the pot at all! Then apply some glue on the pot or
on the plant bottom - whatever feels easier for you - and push your plant into the
pot. Apply some more glue on top of the "soil", and sprinkle ground coffee or fine
sand to give it the look of real soil.
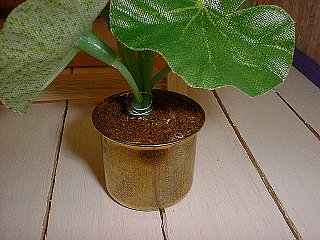
One of my plants with ground coffee soil.
Making all these plants (including painting the pots) took probably less than one hour,
so even if you're busy, you really don't have an excuse to keep your poor dolls without
some lovely houseplants.. LOL
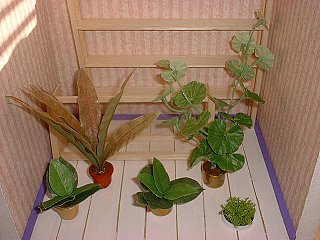
Another picture of the lot..
Back to DIY submenu