Back to DIY submenu
PET STUFF FOR DOLLHOUSE:
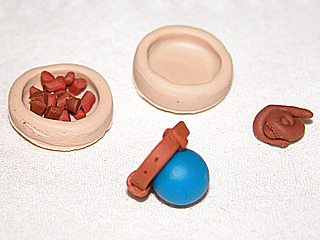
The "dog's basics" I made for a pet swap 2004. A bowl of food (and an empty water bowl for
the swap hostess), a leather collar, a blue ball, and an "accident" (#2).
All these items are very easy to make. The ball: just take a little bit of FIMO in any colour you like, and make a ball of it! LOL.. The poo: take some brown FIMO, make a snake of it, and shape the snake into a dog poo. I've seen loads of different shapes and sizes of such stuff (charming!!), so you really don't need to be a FIMO expert to get it right! I know, I'm not!
Here's how to make the bowl:
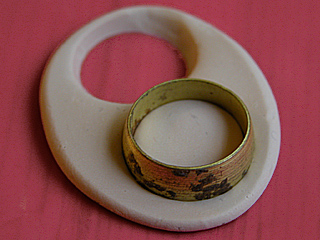
Roll out some FIMO (whatever colour you want to use, for the food/water bowl).
Then take a wide ring, and press it on the clay, like in the photo above. Press
it right through, until it touches the surface - as if making cookies. Leave
the ring there.

Take a crafts knife or a pen, or whatever that has a flat end that's smaller than
the ring. Use it to press the centre of the clay down, to create a little bowl.
The clay will climb up on the edges, and the ring will keep its shape round.
Once it's looking like a little food bowl, lift the ring up. It will probably
lift the clay inside of the ring with it, but you can carefully push it out,
with the help of the tool you used before, or your finger. This may change the
bowl's shape a little bit, but it's easy to fix after it's out of the ring.
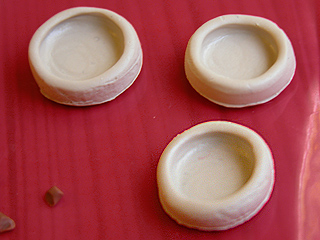
Here we have some empty bowls, waiting to get filled with food (or just baked,
if you want water bowls). Making pet food is really easy. Just take some brown
clay, make little snakes of it, and cut them into bits like you see in the
lower left corner of the photo above. Lightly press a few of these bits together,
and put them in the bowl. If you want the food to look a bit "meatier", mix
some red with the brown clay, and it'll look like the food in the first photo on
this page.
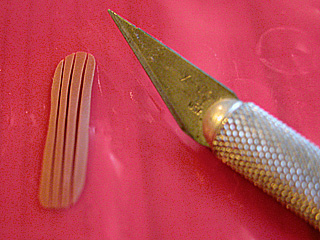
Making the "leather" collar:
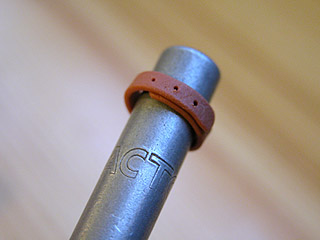
Roll out some brown FIMO, and cut a narrow strip out of it. Take a crafts knife or
a pen, or something else that's about the size of a dollhouse dog's neck, then
wrap the thin strip of clay loosely around it. (If you wrap it too tight, it will
be hard or impossible to get it off without breaking it)
Use a pin needle to make little holes in the "leather" (which is portrayed by
FIMO, in this case..) Then take the little collar off the knife (or whatever you
used as a holder).
Roll out some FIMO again, as thin as possible, and cut even narrower strips out
of it.
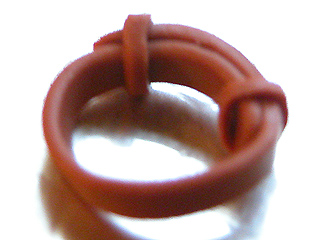
Use these tiny strips to finish the collar, like in the photo above. Just wrap them
around the parts of collar where it's double width - see the picture..
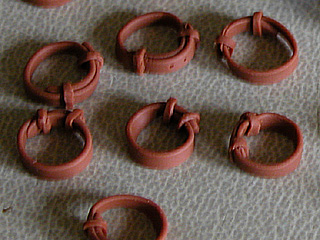
Here's a bunch of collars I made for the swap.
Obviously, these collars are not made to be opened, so they're not really made
to be worn by your mini dogs. However, if you have mini dogs that are soft
(for example, felted mini dogs), it could be possible to push their head through
the collar - or alternatively, you could create a little dog for the collar
afterwards, by felting or glueing pom poms around the collar, so it will be
wearing it once finished.
Back to DIY submenu