MY MINI DIARY, page 22
Back to DIY submenu
March 2006 NOTE:
This page has already been moved to my NEW mini blog, which is replacing
this old site. No need to update bookmarks as the main URL is the same that used to lead
to this site..
QUICK AND EASY OFFICE CHAIR:
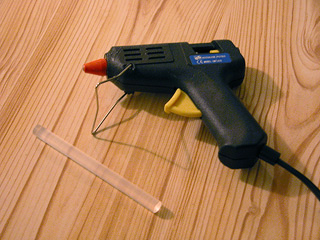
I strongly recommend using hot glue for this project, although it might be possible
with superglue as well..
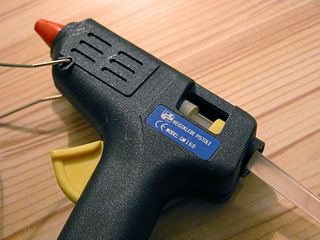
A close-up of a hot glue gun, with a glue stick inserted - in case someone isn't
familiar with hot glue. (Brief instructions: Insert a glue stick, plug in the gun,
and wait for a couple of minutes until the glue gets hot. Once you find pulling the
trigger is easy, and a little drop of glue will come out from the nozzle as you pull
the trigger, the glue is ready to use. Be careful as the nozzle gets very hot, as
does the glue! But the glue will dry and cool down in seconds.)
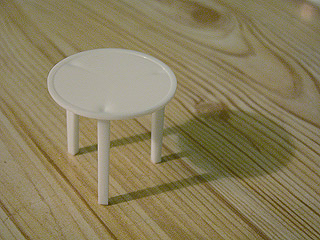
This is what I call a "pizza table". Some pizza delivery places use these plastic
things in the centre of a large pizza, to make sure that the cardboard lid of the
box won't touch the toppings. As you can see, the part makes an ideal little table
for a dollhouse as it is, but this time, I'm using it for office chair material..
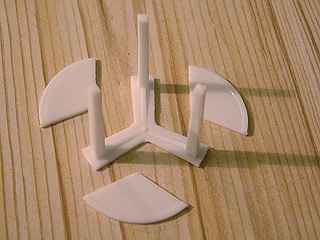
Using strong scissors (or a Dremel, if you wish!), cut out fan shaped bits as shown
in the picture above.
These pictures (above) will give you an idea what the plastic part is for.. Below,
you'll see each of these pictures again, with instructions on what to do.
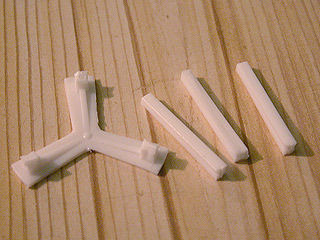
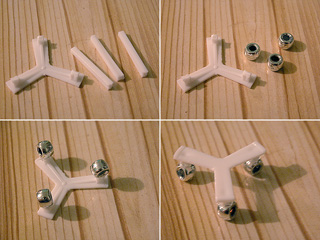
Cut the legs off, leaving tiny stumps of plastic.. (You will need two of the legs
later on, so don't throw them away just yet!)
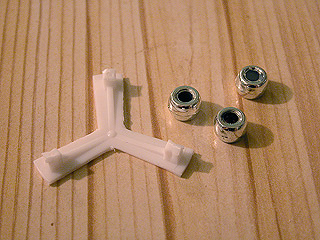
Take three craft beads - these will be the chair's little casters, so pick a colour
you want for the casters. I've used chrome. Black is another good choice for a realistic
look.
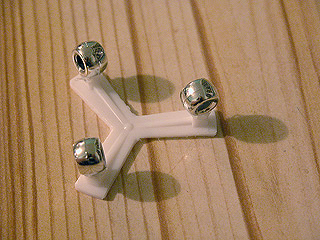
Now, using hot glue, glue the caster beads to the plastic stumps - if you've ever
looked at casters on real office chairs, they rarely end up in the same position
with each other, so if you want a very realistic look, don't make them look too militant..
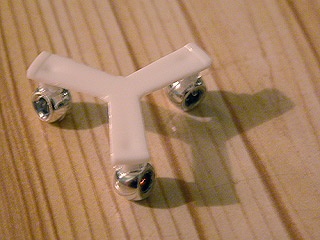
Once the glue has dried (=pretty much instantly), you can turn this part around,
and Tadaa! - you have finished the first part of your mini chair!
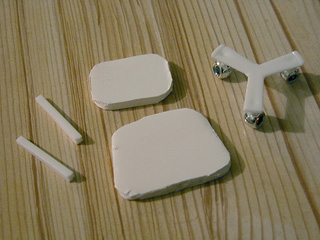
Next, take two of those plastic legs you got from the "pizza table", and cut out
two foam core parts for the seat and back support, as you can see in the picture above.
These will be the main parts you need for putting the chair together.
But real office chairs are padded, for more comfort - we don't want our dolls to
suffer, so let's give them the same comfort.. You don't need to use the same
"wild 70's" wool I used for this chair - pick any fabric that will look good in
your mini office! (Tip: ideally, the fabric should stretch at least a little bit).
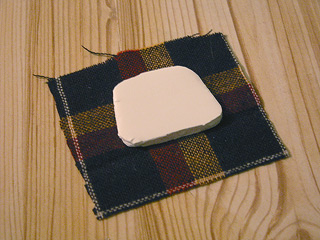
Place some fabric on the table - the right side down! Then, glue the underside of
the seat part on the fabric, as you see in the picture. And finally, turn the fabric
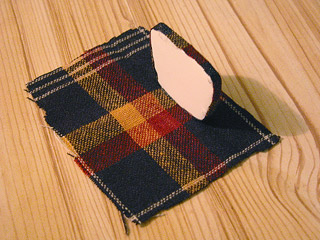
to cover the seat edges, by gluing it on the edges (see the picture below, where
you can see the fabric-covered edges), and trim off any extra fabric.
Now you can start covering the top side of the seat. Again, place some fabric on
the table, right side down.. Apply some hot glue on the back edge of the seat,
and glue it on the fabric - pay attention to the pattern, unless you're using
a fabric with one colour only.
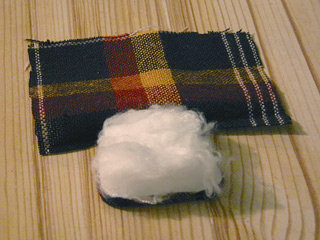
And here's the padding. I've used some cotton wool, but any soft material is OK.
You don't have to glue it on, just hold it in place while...
...you turn the fabric to cover the padding. Apply some hot glue to the front edge
of the chair, and glue the fabric on it. Make sure that the padding will be firm
enough (=don't leave the fabric too loose).
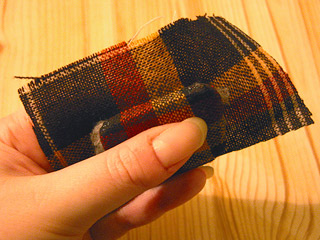
Now, do the same with the side edges, and finally, pull the fabric as neat as possible
and glue it on the rounded corners. Then finish the job by trimming off any extra bits
of fabric.
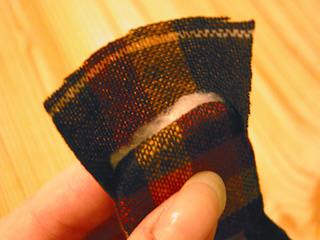
Repeat this with the back support part, though you can leave out the cotton wool.
(Tip: it will end up looking better if you cover its back side first, and then
the front side.)
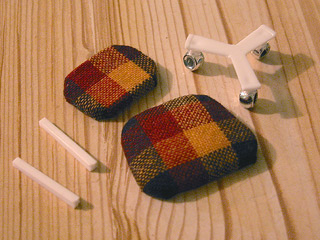
Here are your chair parts now...
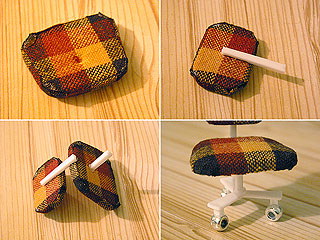
Above, starting from the top and bottom left pictures: First, turn the underside
of the seat up, and push a little hole for one of the plastic legs. This is not
necessary, but will make it a bit firmer once you glue the leg on. Make sure
that you'll glue the leg closer to the back of the seat, because the back support
part will add extra weight on that side, and you don't want an unbalanced chair
that'll keep falling.. Before you glue the leg on, shorten it slightly, or your
chair will be too high. The best way to find the right height is to have a doll
nearby, and see how high the chair should be to look right for your doll.
On top right, glue another leg on the back side of the back support part. You
don't need to shorten this leg at all.
Again on bottom left, glue the back support part on the back side of the seat,
as seen in the picture..
And finally, glue the top of the chair on the caster part, so the leg will be
right in the centre of the "caster fan", see the bottom right picture.
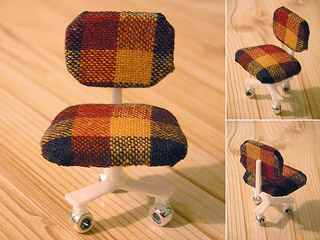
And here you have it - a small office chair!
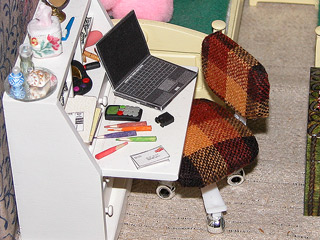
Here's the chair in my dollhouse.
Back to DIY submenu