MY MINI DIARY, page 2
RETURN TO MINI DIARY INDEX
31 January, 2003:
We were talking about
dollhouse showers in one mini group, and since my poor dollies have been
missing a shower for ages (they've only had a shower cubicle, but no
actual shower in there!), I thought I'd better make them a shower. Soon
they won't have to be filthy anymore.. Follow the link below to go to FIMO
page #2, where you can see more about the shower project.
[5 IMAGES MOVED] see them
HERE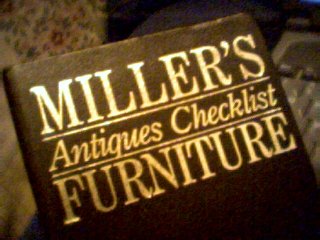
And finally, a handy little
book I've been reading, of antique furniture in general. Very good for
dollhouse purposes, too!
28 January, 2003:
My doll parts are still
waiting to get baked (we just got a new gas oven, etc..), but I've been
gluing my misc. interior design related pictures and materials to create
an idea book (see the new page about it, "Idea book" from the left menu).
I've also changed the name of this diary link, from "My mini diary (news)"
to just "Mini diary" - very easy to figure out, but I thought I'd mention
the change, in case anyone's wondering about some of my old messages in
the mini groups, where I mentioned the link by its old
name.
16 January, 2003:
Daniel brought me some skin
coloured FIMO (43) today, and I started making my first ever 1:12 doll. I
made two hands, two feet (with boots on), and a head. Going to bake them
later tonight! I'd love to make a gypsy doll with a traditional Finnish
gypsy costume, but I'm not sure if I'll be able to find black velvet and
thin lace, so that idea may have to wait..
Follow the link below to go
to FIMO page #2, where you can see pictures about the doll parts and read
more about how the project goes.
[3 IMAGES
MOVED] see them
HERE
8 January, 2003:
Some changes to my mini site:
What used to be "Make two tiny counters" on the left menu, is now
"Materials & Project plans" (I've explained more on the page
itself). Also, the two pages about the Finnish Christmas swap 2002 - one
about the mini crucifixes I made and one about the swap items I received -
have changed names on the menu. They are still both links on the same line
on the left menu, but instead of being called "Christmas swap + items",
they are now called "Crucifixes + Swap 2002", which gives a better
idea of the content of the pages..
I've placed my recent mini gifts to
the dollhouse, but I haven't taken pictures yet. The piano and the double
bed are in the sewing room (temporarily), and Leena's mat is in the
nursery (the colours go really well with the dollhouse in the dollhouse!).
Hanna's pigs ended up as the chef's pets (well, he did already have PETA
posters and 'Babe' poster..), so they are currently in the kitchen. Don't
be getting any funny ideas now!!
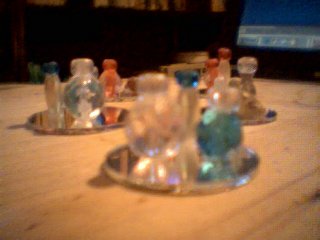
1 January, 2003: 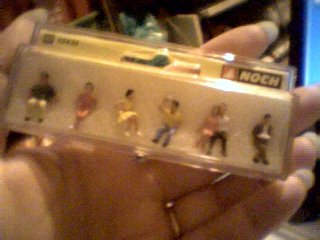
We were just in Helsinki (Finland), and I got some mini
surprises and did some mini shopping as well. The tiny dolls (picture
above) are for model railway scenes, but I bought them for the dollhouse
in my dollhouse - I hope the size is about right!
[3 IMAGES MOVED] see them
HERE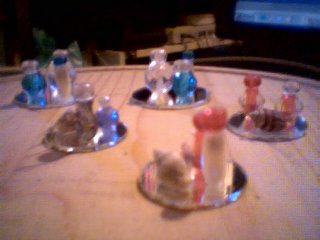
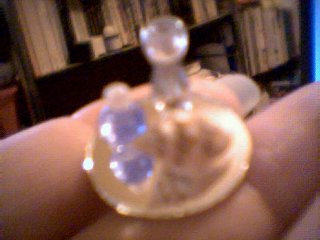
I bought lots of different
beads from Hobby Point and Tiimari in Helsinki, and started my mini year
2003 by making tiny perfume bottles. I used superglue to put the beads
together, and again to glue them on round bits of mirror, which look like
trays. I decorated some of the trays with tiny seashells. 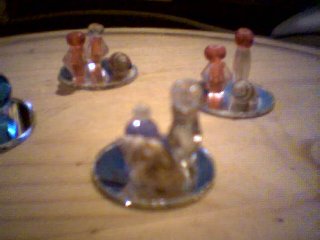
7 December, 2002:
See
the Christmas tree pictures HERE
[IMAGE REMOVED]
In one of the Finnish groups,
Johanna 'challenged' me to make a Christmas tree for the dollhouse in a
dollhouse - she made one herself, too! Hers is already finished, and you
can see it in her album (the 'xmas' picture). I've only just started mine
today. I saved the match shavings from my mini crucifixes, and for this
mini tree, I glued a part of a match stick to a cardboard stand, and
started gluing those shavings to it, one by one. Once the glue has dried,
I'm probably going to spray paint the tree, and then
decorate.
Later:
[IMAGE
REMOVED]
Well, I spray painted it, but wasn't really happy with
the colour, so I took my finest brush and painted it a bit darker green.
Once it had dried, I made a star by gluing a 'golden' sticker on a piece
of copper wire (from electric cable), then wrapped the wire around the
tree. I also added some thin gold string that I pulled out of a ribbon.
[IMAGE REMOVED]
Here are two pics (above
and below) of the Christmas tree in the dollhouse of the dollhouse. I was
lucky to get the size just right as I didn't actually measure it when I
started making it!
[IMAGE
REMOVED]
27 November, 2002:
I've updated the framed
roombox page again (see menu on the left), and added a page about the mini
crucifixes I made for the Finnish Christmas swap (see menu). There are
also some new photos on the 'Mini gifts I've received' page - I got a
parcel from my mam in Finland, and she had sent me another mini disco
ball, a nice fridge magnet (makes a poster for dollhouse), and a mini
book, which is not exactly dollhouse size, but still very cute! And it's
about cats, of course..
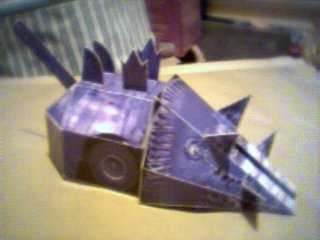
Daniel brought me a 'Cut N' Stick Matilda'
sheet (probably from some gaming magazine), and I made him a robot:
25 November, 2002:
I found some old stuff in a
box, and there was a photo album from the late 80's. It had Christmas
photos from 1988, and some of them showed the nativity scene which I made
with the porcelain figures we got from friends: 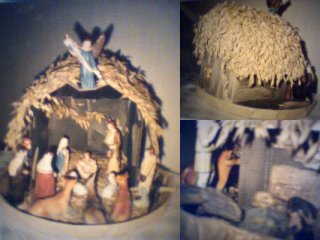
Just a cardboard box which I painted and decorated. Most of
the decorations are things I had collected from the beach, in our summer
place. I only meant to make the scene for that particular Christmas, but
my mam liked it so much that she has kept it like that, and they still
take it out for Christmas.
Roomboxwise, I've been working on a little
two-seater couch, made of foamcore (thanks to Glynis for giving me a word
for that strange material!), cardboard, cotton wool and fabric. So far I'm
pleased with the general shape of it, but there are some parts of it I'm
not happy with.. We'll see what happens..
I also added a little
something to the roombox, but I can't show a photo of it yet, because it's
what I made for the Finnish Christmas swap, and people haven't received
their swap parcels yet.. They should receive the parcels this week,
though, so in a few days time I can finally go public with that particular
item!
24 November, 2002:
NOTE: I have moved the "Framed roombox" project to
its own page, click
here, because there were so many pictures by now that it was taking
over my mini diary. I have left the original texts here, though, but you
will see an [IMAGE REMOVED] message where I had the photos. You can see
them all on the Framed roombox page!
I made a floor to the box,
of old linen that I've used for my dollhouse as well. Here's a close-up
photo:
[IMAGE REMOVED]
The ladder to the
balcony will be leaning on the back wall on the left side, so there is
going to be some space in front of the ladder where I couldn't put any
furniture (as otherwise who ever lives in the box couldn't get to the
ladder at all, and would have to stay awake all the time like me). That's
why I decided to put a fake door on the left wall! I made it of the same
foamy stuff I've used for lots of other things in this project, and here's
a picture of it, with a detail of the doorknob:
[IMAGE REMOVED]
I cut out thin strips of the door
sheet, to give it some depth, then painted it.
23 November, 2002:
Here are some pictures of
the balcony, which I've now painted, and a little bed I made:
[IMAGE REMOVED]
I decided to make the balcony
entrance behind the railing, so the ladder (which I haven't made yet) will
lean on the back wall:
[IMAGE
REMOVED]
Below view:
[IMAGE
REMOVED]
And here is a closer look of the cardboard bed:
[IMAGE REMOVED]
I made the bed of thin
cardboard, then wrapped some fabric around it and glued it all in its
place. The pillow is just a strip of white cotton. I glued one end
together with superglue (pure laziness here, I didn't feel like looking
for my sewing kit), then filled it with some cotton wool, and then glued
the other end together with superglue as well. I actually had a bit of a
gluing accident, and there is now a tiny bit of wood from a clothes peg
firmly attached to one corner of the pillow, so I may either make a new
pillow, or I might just cover that corner with the duvet (which I haven't
made yet), heh..
22 November, 2002:
Who needs sleep, eh? I spent
the night working on the roombox ceiling and walls. In this first picture,
you can see the ceiling, which is just a piece of natural white linen I
glued there to give the ceiling some texture. Leaving it just plain white
would have been boring.. You can also see the wallpaper - surprise
surprise: Laura Ashley again! (If you've browsed my other projects, you'll
know what I'm talking about)
[IMAGE
REMOVED]
I ended up going for the balcony option (see my entry
on November 21), so in this next picture you can see how I'm putting
together a bit of a railing for the balcony. The balcony floor is cut from
the same foamy sheet that I used for making the box itself, and the dark
sticks are planting sticks (or whatever they're officially called - for
gardening, anyway).
[IMAGE REMOVED]
And
in the next picture, I'm holding the (unfinished) balcony on the spot
where I'm eventually going to glue it. I think I'm going to make a ladder
to the balcony instead of stairs, because there's only so much room in the
box. I'm not sure yet, whether the balcony entrance will be on the front
(so I'd take out two or three sticks from the railing), or behind the
railing (so I'd make a hole on the balcony floor). We'll see..
[IMAGE REMOVED]
21 November, 2002:
I have some glue again
(woohoo!), so I've been putting together the box for my 'framed room'.
Here's a photo of the freshly glued box itself:
[IMAGE REMOVED]
I also tried what it'll look like
with the frame and glass:
[IMAGE
REMOVED]
I haven't decided yet, if the floor will be a longer or
shorter side of the box. Probably a shorter side, because then I'd have
more height to play with, and that means I could add some sort of a
balcony or something.. Maybe with a bed up there. Studio apartment? Who
knows..
I'd actually love to make this a roombox that I could give to
my parents for Christmas, but since the box is made of fragile material,
I'm not sure.. I can just picture some Finnair staff member announcing at
the airport that I can't take it as hand luggage.. *horror*
16 November, 2002:
I still haven't finished the
previous roombox (the upper shelves need some more decorations or
something, and I want to put something in the left corner as well - maybe
the parrot..), but today I finally started working on something that I've
been planning for a while.. I took an 8"x10" black photo frame:
[IMAGE REMOVED]
I left the glass attached to the
frame, but took out the back panel & stand. I'm going to try and make
a roombox with this framed glass as the front 'window'. I'll have to make
a box myself, and ideally I'd use wood, but since I don't have any, I'm
going to use a foamy material that I got with some PETA posters ages ago -
this stuff was in the parcel to protect the posters, and I have two big
sheets of it, or one big sheet now that I've cut the other one in pieces
for my future roombox, heh:
[IMAGE
REMOVED]
The material is very light, so I'm not sure yet whether
it's strong enough, or whether it can be glued firmly together. I'm all
out of glue at the moment, anyway, so it'll be a while until I know. But
my plan is to make a 'framed room', with maybe side windows (for light,
since I can't afford to put any real lights in). I might make another
fireplace as well, because I've bits of an old broken frame that would
make a really nice little fireplace if painted and glued together. But I'm
not 100% sure about that - I might save the fireplace for my dollhouse,
which is going to get a revamp someday when I have a bit more money to put
in materials.
Something else I made: I saved a bag of nut shells from
Hallowe'en, because they look like they'd make some interesting
decorations for minis.. Here's an example, a half a peanut shell, painted
orange - nice little bowl: 
RETURN TO MINI DIARY INDEX